Building a Collection In WHDL
Building A Collection
Collections are special pages in WHDL that organize resource content pages (dissertations, articles, books, media, sermons, etc.). The types of resources can be mixed, but they all must be that specific content page “Resource.” In other words, you can’t build a collection of collections, landing pages, authors—only resources. See below “Building Complex Collections” if you need more information about collecting pages other than resource pages.
- Gather the information you need to organize your collection.
- Do you have at least one resource to start your collection? (You can always add more resources later, but you must include at least one resource to save it.)
- How many resources will it include? Are there multiple sections or types of resources that will be collected?
- If dealing with many resources, think about creating landing pages to gather multiple collections. See below for examples and layouts.
- What will you call the collection?
- Do you want to assign subject headings?
- Do you want to describe the collection? (Yes is the recommended answer.)
- Create your collection by making sure you’re logged in at your desired subdomain (for example: ht.whdl.org).
- Hover over “Content,” hover over “Add Content,” click on “Collection.”
- Enter the name of your collection.
- Add subject headings as desired.
- Add a description.
- Brief Collection Description: Appears when the collection is linked on another page (such as when used as a feature collection or in a related collections list at the bottom of a collection page). It is character limited but I don’t know how much.
- Example:
- Example:
- Full Collection Description: Appears on the Collection page. Any length of text will be displayed. (But know that users will need to scroll past this information to get to the resources so keep it short.)
- Brief Collection Description: Appears when the collection is linked on another page (such as when used as a feature collection or in a related collections list at the bottom of a collection page). It is character limited but I don’t know how much.
- Cover image: Add a cover image if it is beneficial to the collection. If you don’t add a cover image, the first 4 resource cover images will display, which can be very attractive.
- Resource Sections:
- You can add as many resource sections as you like. Each one will display in a Jump to/ index for easy navigation. (See example from NNU Dissertations.)
- Section Title is required and will display in the Jump to/ index and on the left side in bold.
- Section Description can be skipped, but it’s useful if you have distinct differences between sections.
- Link can also be skipped. This is most useful if you gather several collections on a landing page as you can add a link back to that page. If you add a URL, you MUST add link text. (Or if you add Link text you MUST add a URL.)
- Resources: Type the title of your resource using exact phrases from the title field (including special characters such as dashes, slashes, etc.) until you see the resource in the autocomplete list. Click the desired resource from the list.
- If you can’t get the resource to appear as part of the autocomplete list, go to the resource and copy the exact title in full and the node number in parentheses (for example, Herald of Holiness - March 17, 1915 (16514) ). This should only be necessary for periodicals that are distinguished by volume/number or date as the special characters (periods and commas in particular tend to flummox the search algorithm).
- Click “Add another item” to add more resources.
- Note: it can be easy to click “Add Resource Section.” If you’re asking to add a section title again, that’s what has happened. Click remove (confirm removal) and try again.
- Add resources and/or resource sections until your collection is complete.
- Save as Published.
Building Complex Collections:
Use Landing Pages if you need to organize a more complex collection.
Example 1: The Herald of Holiness/Holiness Today Collection uses one landing page with multiple “Listing Layout” Page components to organize the collections by volume.
(Multiple “Listing Layout” Page Components for each decade).
-
- Collection Page for each Volume.
- Collection Page for each Volume.
- Etc.
(Listing Layout Page Component for next decade.)
-
- Collection Page for each Volume.
- Collection Page for each Volume.
- Etc.
(Listing Layout Page Component for next decade.)
-
- Collection Page for each Volume.
- Collection Page for each Volume.
- Etc.
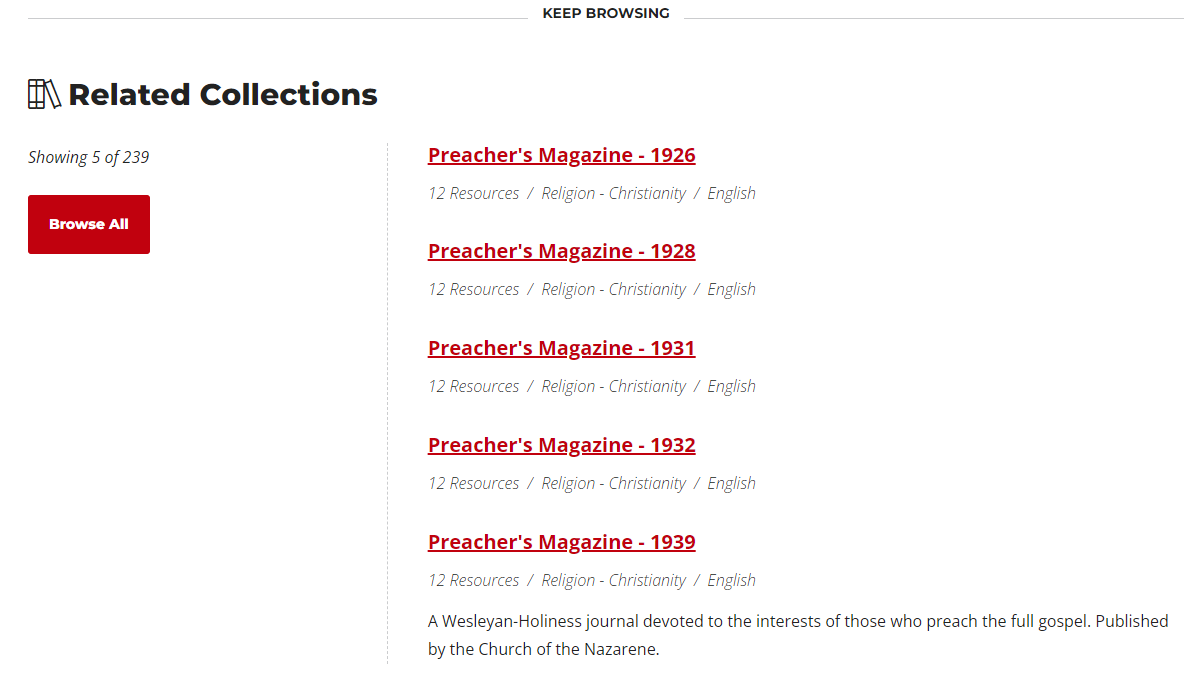
Example 2: Preacher’s Magazine is structured with a landing page with one listing layout that links to landing pages to separate out the decades. (This requires less scrolling to get to earlier editions of the magazine.)
- A Landing Page for the Main collection (single “Listing Layout” Page Component)
- A Landing Page for each decade
- A Collection Page for each Volume/Year
- A Collection Page for each Volume/Year
- Etc.
- A Landing Page for the next decade.
- A Collection Page for each Volume/Year
- A Collection Page for each Volume/Year
- Etc.
- A Landing Page for the next decade.
- A Landing Page for each decade
When building collections like this, start by creating a draft of your main collection page and save.
- Hover over “Content,” hover over “Add Content,” click “Landing Page.”
- Add a title (the only required element). And save as draft.
- Note the node number (when you save it it will be the last 5 digit number at the end of the URL) and title. You’ll use this to create the link back to the collection. (See step 7d above.)
If desired or necessary, create the intermediate landing page the same way (this is the Preacher’s Magazine model). Then move on to creating your collections. Note the title/format of your collection titles to add them to the landing page later.
Once your collections are made,
- Go back to your landing page and click “Edit” in the bottom right tool bar.
- Scroll down to page components and click the down arrow to the right of “Add Checkerboard.” Click “Add Listing Layout.”
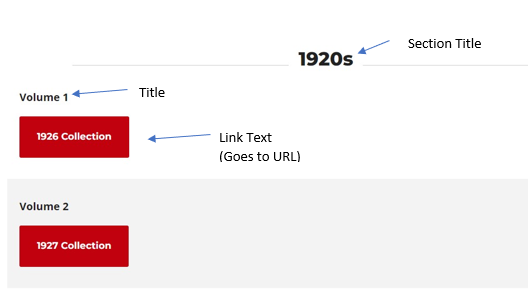
- Add Section Title (Required).
- Add Title (Also required)
- Add URL (you can search by page/collection title or use the node number following the instruction text “/node/#####”) (Not required, but the reason you’re using this page component so it is required. ????)
- Add Link text. (Every URL requires a link text.)
- Note: It’s tempting to make the Link Text and Title very similar. The link text appears on a button so it could be “Go to collection” or something like that.
- Screenshot of how the Section Title, Title, and Link text look on the landing page.
- Click “Add List Item” and repeat the process for the other collections or landing pages you wish to add until you’ve added them all.
- Change to “Published” and save the page.
- If you have structured a collection like Preacher’s Magazine using additional landing pages as an intermediate step, then you’ll need to edit the main landing page to add those intermediate landing pages.
- Intermediate Landing Pages don’t provide an easy way to add a link back to the main landing page. Add a link to the main landing page in the description (hyperlink the text using the WYSIWYG editor).
Organizing and creating collections, especially complicated ones that include multiple levels of landing pages, can be hard to conceptualize. If you have questions, please reach out to the WHDL Development Team. We are happy to walk you through the process.